Fit Styler Fashion Pattern Making
Search Results
20 results found with an empty search
- Pattern (sewing)
In sewing and fashion design , a pattern is a template from which the parts of a garment are traced onto fabric before being cut out and assembled. Patterns are usually made of paper and are sometimes made of sturdier materials like paperboard or cardboard if they need to be more robust to withstand repeated use. The process of making or cutting patterns is sometimes condensed to the one-word Patternmaking , but it can also be written pattern(-)making or pattern cutting . A sloper pattern (home sewing) or block pattern (industrial production) is a custom-fitted, basic pattern from which patterns for many different styles can be developed. The process of changing the size of a finished pattern is called grading . Several companies, like Butterick and Simplicity, specialize in selling pre-graded patterns directly to consumers who will sew the patterns at home. Commercial clothing manufacturers make their own patterns in-house as part of their design and production process, usually employing at least one specialized patternmaker. In bespoke clothing , slopers and patterns must be developed for each client, while for commercial production, patterns will be made to fit several standard body sizes. Pattern making A patternmaker typically employs one of two methods to create a pattern. The flat-pattern method is where the entire pattern is drafted on a flat surface from measurements, using rulers, curves, and straight-edges. A pattern maker would also use various tools such as a notcher , drill , and awl to mark the pattern. Usually, flat patterning begins with the creation of a sloper or block pattern, a simple, fitted garment made to the wearer's measurements. For women, this will usually be a jewel-neck bodice and narrow skirt , and for men an upper sloper and a pants sloper. The final sloper pattern is usually made of cardboard or paperboard , without seam allowances or style details (thicker paper or cardboard allows repeated tracing and pattern development from the original sloper). Once the shape of the sloper has been refined by making a series of mock-up garments called toiles (UK) or muslins (US), the final sloper can be used in turn to create patterns for many styles of garments with varying necklines, sleeves, dart placements, and so on. The flat pattern drafting method is the most commonly used method in menswear; menswear rarely involves draping. You can learn pattern drafting on many fashion design courses either on a short further education course or as part of a Fashion degree at a university. The draping method involves creating a muslin mock-up pattern by pinning fabric directly on a form , then transferring the muslin outline and markings onto a paper pattern or using the muslin as the pattern itself. Designers drafting an evening gown or a sculpted dress that uses a lot of fabric typically cut on the bias will use the draping technique, as it is very difficult to produce with a flat pattern. Pattern digitizing After a paper/fabric pattern is completed, very often pattern-makers digitize their patterns for archiving and vendor communication purposes. The previous standard for digitizing was the digitizing tablet. Nowadays, automatic options such as scanner and camera systems are available. Fitting patterns Mass market patterns are made standardized, while human bodies vary, so store-bought patterns only fit a small proportion of people well, and an experienced sewist can adjust standard patterns to better fit any body shape. So, a sewist may choose a standard size (usually from the wearer's bust measurement) that has been pre-graded on a purchased pattern. They may decide to tailor or adjust a pattern to improve the fit or style for the garment wearer, using french curves, hip curves, and cutting or folding on straight edges. There are alternate methods, either directly on flat pattern pieces from measurements, using a pre-draped personalized sloper or using draping methods on a dress form with inexpensive fabrics like muslin. Creating a muslin (also called toile using calico), similar to a garment template, is one method of fitting. Muslin material is inexpensive and is easy to work with when making quick adjustments by pinning the fabric around the wearer or a dress form . The sewist cuts muslin pieces using the same method that they will use for the actual garment, according to a pattern. The muslin pieces are then fit together and darts and other adjustments are made. This provides the sewer with measurements to use as a guideline for marking the pattern pieces and cutting the fabric for the finished garment. Pattern grading Pattern grading is the process of shrinking or enlarging a finished pattern to accommodate it to people of different sizes. Grading rules determine how patterns increase or decrease to create different sizes. Fabric type also influences pattern grading standards. The cost of pattern grading is incomplete without considering marker making. https://en.wikipedia.org/wiki/Pattern_(sewing)
- Getting Started Pattern Making Basics
A beginners guide, everything you need to know about pattern making tools. The tools described here form a basic selection with which most pattern cutting techniques can be achieved. The best way to discover which of the many tools available to pattern cutters are most appropriate and how they work is to seek advice from patterns cutters and technicians.Each practitioner will have their own favorite tools, gathered together during a lifetime of experience. 1-Hip Curve 2-Armhole Ruler x 3 3-Pattern Hooks // Large and Small 4-Cutting Mat 5-Glue Stick 6-Markers Pens in black, blue, green, red and biros 7-Dress pins: long, short, fine, thicker 8-Highlighter pen 9-Scal pen 10-Sellotape, masking tape, Scotch Magic Tape, Double-sided sticky tape 11-Pattern Notcher 12-Pattern Hole Punch 13-Tape Measure: withg imperial and metric measurements 14-Metal Ruler 15-Metal Ruler 16-Pattern Master - new version (top) old version (below) 17-Set Squares 18-Grading Ruler 19-Unpicker / quick picker 20-Tracing wheels x 2 21-2H pencils 22-Pencil sharpener and soft eraser 23-Pattern drill with drill parts 24-French curves, as a set 25-Tailor's chalk and chalk dispenser 26-Paper/card scissors 27-Fabric scissors 28-Awls x 3 29-Pattern cutting paper, dot and cross 30-Pattern cutting card
- Fashion Dotted Pattern Paper
Pattern paper has code numbers to indicate its weight from heavy to light: Heavy-weight Paper - Weight Code Heavyweight pattern paper is called tag board, manila, or hard paper and is used primaily for production patterns. Light-weight Paper - Weight Code 1 to 5 Double-Duty Marking Paper Lightweight paper is called marking paper. Marking paper is used for making markers and to develop first patterns. The paper is marked with a choice of symbols and numbers, letters, short lines, and/or dots. The symbols help when aligning the grainlines of the patterns for tracing, andthe numbers give and account of inches of the finished marker. Color-coded paper (color on one side only) has two functions: to indicate right-side-up of the pattern pieces and/or to indicate the design division to which the patterns belong. #patternpaper #fashiondottedpaper #3Dfashion #fashion #fashionblog #styles #fashionpost #fashiondesign #fashionshow #fashionable #styleblog #instastyle #style #fashionblogger #fashiondesigner #fashionlover #instagood #beauty #styleblogger
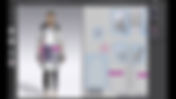
- 3D Design Software
Create 3D visualisation straight from your patterns, taking into account the properties of the textile, the body sizing of the human and of course, the patterns and their grading, 3D lets you see the virtual garment, check for fit, check the sizing, see how it will drape and much more. The complete integration with Pattern Design Software makes 3D easy to use and means alterations can be seen in 3D in an instant. The 3D image can be sent to all involved in the design process, customers and manufacturers so that the garment can be viewed from any angle. Alterations can be drawn in 3D and extracted into a 2D pattern. 3D design software for pattern making Sample garments are expensive – 3D software reduces these Time to market is dramatically reduced True to Life fabric simulation Produces high quality products through precise fitting
- What are the best CAD fashion design software?
You might want to 3D print your creations, your clothes, accessories or even shoes. Or maybe you just want a tool to make some renderings. Whatever your project, we will help you to find the perfect CAD fashion design software in order to create your project. CAD software specially made for fashion design 1- CLO CLO 3D is a design software that is really easy https://www.clo3d.com to use, with an intuitive interface and a lot of video tutorials to help the users. It is allowing to get renderings from 2D patterns. You can make all the iterations that you want, the software is automatically generating colors and textures on the added parts. 3D is a good method to get a good visualization of the products, to see how it fits, how the silhouette is. 2- Tuka3D Tuka3D is an easy to use 3D fashion design software develop by Tukatech. This amazing software allows you to scan your fit model, and to adjust it with the diverse options of measurements available. You can create virtual fitting session with an animated model who can move, dance, run, etc. This 3D software is really made to do virtual prototyping, allowing you to make many trials just for one product. This design tool is helping designers to work quickly and easily thanks to virtual clothes samples. 3- MarvelousDesigner MarvelousDesigner is a software allowing to create 3D virtual clothing. With this platform, you can create any clothes, from basic shirts to really detailed and complex dresses or suits. The goal of MarvelousDesigner is to make the fashion design process more accessible, with many options and realistic renderings. It is possible to work on the texture of the clothes, but also on the details and accessories. Moreover this software is compatible with a lot of other 3D software, so it is even easier to edit your 3D model. You can import or export 3D models from software such as 3DS Max, Maya or ZBrush, which is really convenient and will surely improve your design process. 4- Browzwear Browzwear will help you to make creative designs for your customers, and it will allow you to work even faster. Browzwear offers different modules: VStitcher, a solution for 3D virtual prototyping. It is addressed to developers, technical designers and pattern makers. It is allowing to convert 2D patterns into great 3D models and prototypes. Lotta, a 3D fashion design solution that will help designers to create clothes with a total freedom. You can easily work on Adobe tools such as Photoshop or Illustrator, and synchronize your 2D drawings and patterns with Lotta. It will help you to visualize your products in any trim or color. These solutions will help you to communicate more efficiently with designers or manufacturers. 5- Romans CAD Romans CAD is a software created for the footwear industry, and the creation of leather goods. This CAD fashion software is particularly efficient to create prototypes, Romans CAD is allowing designers to make all the changes that you need on your products with a lot of accuracy. This is an efficient cloud based program, made to work faster, and to improve the communication between designers and manufacturers. “ This is a cloud-based software ” explained Jean-MarcPedeboy to us “ The world of fashion is evolving and brands have to work faster. Romans CAD is offering a better communication and collaboration for people working in the footwear industry ” 3D modeling software that are not exclusively for fashion Keep in mind that you don’t necessarily have to use a CAD fashion design software to make your fashion prototypes or finished products. There are some really efficient 3D software on the market that you can also use in the fashion industry. We’ve listed some of them for you: 6- Fusion 360 Fusion 360 is a design software developed by Autodesk. It is a cloud based software, allowing the different users to communicate and work faster. This CAD program is really good to give life to your design ideas, that is why you can use it to create fashion items such as clothes, shoes or accessories. It has advanced software tools, allowing to make solid modeling, mesh modeling, and parametric modeling. As this 3D modeling software has a large community, you will easily find guides and video tutorials to help you with your creations. Check our tutorial to know how to prepare a 3D file for 3D printing using Fusion 360. 7- Maya Maya is a 3D modeling software developed by Autodesk. Maya has advanced software tools and can be used by professional designers in the fashion industry. We saw recently on our 3D printing blog that this software is great for chara design. It is efficient to create characters but also clothes movements! So, if you are looking for software offering amazing renderings, you can use Maya. This modeling program can have various applications, even in the world of fashion, as it is a really powerful and polyvalent tool. For a better experience, don’t forget that you can combine Maya and MarvelousDesigner, a CAD fashion design software that we saw previously in this blog post! If you want to know more about Maya, check out our tutorial that will help you to export your file for 3D printing. It will allow you to use our 3D printing service quite easily. 8- ZBrush ZBrush is an impressive modeling tool to work on painting and texturing. It is totally possible to work with this CAD software for the fashion industry. Keep in mind that this software has advanced tools and is addressed to experienced users. ZBrush is also a good solution if you are looking for a software to get impressive renderings. As for Maya, don’t forget that you can combine this software with MarvelousDesigner, a CAD fashion design software that we talked about previously in this top! Moreover, we have a partnership with ZBrush, allowing you to upload directly your 3D file on our online 3D printing service. It could really improve your additive manufacturing experience! 9- Rhino Rhino is a really efficient 3D modeling software. It can be used in various industries, and the fashion industry is not an exception. As this is a professional tool, you need to be experienced to use it and to create accurate patterns for your prototypes or final products. To create impressive designs using advanced graphical algorithms, you can use Rhino 3D with the plugin Grasshopper. If you are interested in creating jewelry with 3D modeling, you can also use Rhinogold, specially developed for jewelry design. You can also read our Rhino tutorial if you need more information to work on 3D modeling for 3D printing. As you can see, there are a lot of options available if your are planning to use a CAD software for fashion applications. We hope that you found the CAD fashion design software that will fit your project, help you to design clothes and create perfect patterns. If you want to 3D print your prototypes or if you want to use additive manufacturing to produce your fashion items, you can upload your 3D designs on our online 3D printing service. https://www.sculpteo.com/blog/2018/02/07/top-9-of-the-best-cad-fashion-design-software/ #3Dfashion #fashion #fashionblog #styles #fashionpost #fashiondesign #fashionshow #fashionable #styleblog #instastyle #style #fashionblogger #fashiondesigner #fashionlover #instagood #beauty #styleblogger #fashionstyle #fashionweek
- Sewing Patterns Grading
Pattern grading is the process of turning base size or sample size patterns into additional sizes using a size specification sheet or grading increments. This can be done manually or digitally using computerized pattern drafting software. Standard grading rules are based upon ergonomic measurements of the body, mathematically extrapolated or interpolated according to one of numerous pattern making systems. This is often chosen with an eye to the target market for a manufactured garment, in which one system or another prevails, according to consumer taste. Typically, the first pattern is developed in one size and is then graded up or down according to the chosen system, ensuring an optimum fit in all sizes. Grading is a necessary step that must be taken before outsourcing sewing because sewists will require sets of specific patterns for cutting and sewing. (These are typically copied on to a durable medium such as oak tag paper or vinyl , and are referred to as "card sets" in the trade.) Grading will not create shape, but will only increase or decrease the size of the original shape. Methods of Grading There are three basic methods of pattern grading. There is not a superior method; they are all equally capable of producing a correct garment grade. These include: Cut and spread: This is the easiest method, which acts as the basis of the other two methods. To perform this method, you must cut the pattern and spread the pieces by a certain amount to grade up, or overlap the pieces to grade down. The only tools you will need for this method are a pencil, tape, ruler, and scissors. Pattern shifting: Pattern shifting involves increasing the overall dimensions of a pattern by moving it around at a constant distance. After you move it, you redraw the outline in order to produce the same results as cut-and-spread. Computer grading: Computer grading is the most recent development in grading technology. It is also the fastest method. It takes the processes of the two former methods and digitizes them.
- What is a Fashion Techpack use for?
A tech pack is an informative sheet that designers create to communicate with a manufacturer all the necessary components needed to construct a product. Typically designers will include measurements, materials, colors, trim, hardware, grading, labels, tags, etc. Any crucial aspect of your design needs to be described in your tech pack. The more detailed a tech pack is, the less room there is for error. Tech packs are a crucial part of the fashion industry. They are the ‘blueprints’ for your garment or accessory that are needed to bring your product from concept to creation. Creating tech packs is a necessary part of a fashion designer or technical designer’s job and is usually a skill that is requested when you are looking for a job in the industry. Tech packs are used to communicate your designs effectively to the factories to make your design into a ‘1st sample’ (basically the 1st prototype of your garment). Fashion tech packs outline every element of the garment including the fabric, stitching, hardware, measurements, and more. What is a Fashion Tech Pack? Simply put, a Fashion Tech Pack or Spec pack, is an information package that, in the first instance, is sent out to factories to acquire pricing for making your samples. Once you have selected your factory they will use the pack as a blueprint for your sample production, as it contains all the necessary components required to manufacture it. With this essential tool to hand, and after your samples have been approved, you could move your production to any factory anywhere you want. Features of a Tech Pack You could use your Fashion Tech Pack as a resource document for purchasing materials and trims, and in future years you could refer to it and revisit a vintage design. It also puts you in a position of financial security. If the factory chooses to ignore any of the information in the pack, and do their own thing, they will be at fault. If this should occur, you will be in a stronger position to ask for your money back or to seek legal aid. The Fashion Tech Pack is the key to realizing your vision. As you produce your products, you might consult with a machinist and pattern maker, and at times a technical designer. The information included in the Fashion Tech Pack will change and develop the following fit meetings and product development. Your Tech Pack notes will help the factory to produce accurate, well-fitted garments. As the designer, you produce the Fashion Tech Pack – the more detail within means there is less room for error and inefficiency. It is completely under your control. You could think of it as your Product Bible. Let’s take a look at what’s inside. What will you need to create a Tech Pack? Technical drawings: A clean line drawing of the garment with a front and back view. Reference materials: Magazine images referencing finishes and details that you would like on your products. Samples of special finishes and techniques Packaging information: How are the products to be packaged, i.e. in cellophane bags or boxes? A Pattern: A professional pattern of the garment with all relevant information included on it. The factory sometimes offers a pattern-making service, or you will have to source a pattern cutter. Sample Measurement Spec Sheet: This document is given to the factory if the pattern is to be made by them. Some factories will only use patterns made in-house. It must include the following: SKETCH: front and backline drawing with the measurement details for the garment. Drawn by hand or computer. MEASUREMENT CHART: This will contain the various size measurements of the required item. Comments: Notes taken while reviewing a sample for approval. These should be included in the Fashion Tech Pack. Remember to include the dates. This way you can easily track changes that you have made and can share them with the factory. Specification Sheet (commonly known as Spec ): This is given to the factory when a sample is required or an order needs to be placed. It must be reissued whenever amendments are made to the garment. It must include the following: SKETCH: front and backline drawing with the measurement details for the garment. Drawn by hand or computer. MATERIAL DETAILS: Swatches, product code, fiber content, and supplier details. MEASUREMENT CHART: This will contain the various size measurements of the required item. It will be used to check that the measurements are correct on the finished garment. PRINT INSTRUCTIONS: Information regarding the type of print on the product and its placement. EMBROIDERY INSTRUCTIONS: Pertaining to the type of embroidery, its size, and placement. STITCH INSTRUCTIONS: In reference to stitch type, thread to be used, and stitch length. CARE INSTRUCTIONS: In reference to washing finishes for items such as denim garments. ACCESSORIES INSTRUCTIONS: Trim details – Fastenings required with product codes, fiber content, and supplier details. LABEL INSTRUCTIONS: Placement details for brand logo labels and care labels. COMMENTS SECTION: Used by the factory to make a note of anything related to product construction. Denotes items that are very important when preparing a garment Tech Pack What are the benefits of Spec Sheet? There are many benefits of a Spec Sheet, and in my experience, it pays to do this properly. Helps factories to save time in selecting/contacting suppliers of fabrics and trims. Enables the costing process to be more efficient. Can be used to create a pattern if made in the factory. To provide PoMs (points of measure) to be used to check measurements against the finished garment. Prevents mistakes from being made in the sampling process. So, is the Fashion Tech Pack absolutely essential for successful communication and fashion design? Yes. Yes. YES!!! You’ll have credibility with manufacturers, and have a clear overview of what you’re creating and how it’s developing. There are far too many variables for you to keep track of. Remember, all of this information is needed for EACH product that you create. It’s obvious that you’ll need to work carefully and methodically to put it all together in a style that works for you, and you may even need to call in a few favors. The resources below will guide you in your efforts. If you’re confused between a Fashion Tech pack and Specification sheet then just know that Spec sheet forms a part of Tech Pack. For a better understanding, read here. Tech Pack Resources The manufacturing side of the fashion industry can be a minefield to a novice designer. With so much information required in a Fashion Tech Pack, it’s probably a good idea to make tech your friend and embrace it wholeheartedly. Cashflow Some factories ask for deposits before commencing the project. Keep on top of things by using Paypal . Compiling a Technical Package (otherwise known as a Fashion Tech Pack or SPEC Pack) for your design idea(s) will be the key to unlocking the door to that mysterious fashion world you want to enter. Without one, and as someone with no experience or knowledge of the industry, factories will not deal with you and you will face many problems. For instance, you could assume that the factory can read your mind and understands your brand, vision, or style. That they can look at your drawings and listen to your descriptions and choose the correct sewing thread color, decide on the number of stitches used per inch, figure out pocket placement, and source your materials. That they can figure out the cost of your samples. But it doesn’t work like this. In reality, you will need to make all of the decisions related to how you would like your garment to look. Without this information, you’re likely to receive ill-fitting, badly made garments, and have to pay again to have them remade.
- Marker Planning Inwards Garment Manufacture
Introduction: Marker is a long sparse newspaper which contains all necessary pattern pieces for different sizes for a detail manner of garments. It is planned inwards such a agency that textile wastage would live least. By making a mark it is possible to attain to a greater extent than exercise goodness past times producing a garment amongst reduced wastage. Normally the width of a mark is kept according to the cutable width of the textile together with the length of a mark usually depends on the release together with sizes of pattern placed on a marker. The length too depends on- Number of garments to live produced from a spread lay Length of cutting tabular array Production planning etc. For marker making , white newspaper or newsprint newspaper is used. At showtime all large patterns are placed on the marker. After that modest sized patterns are placed inwards betwixt the gaps of large patterns. In this agency higher mark efficiency tin live achieved. To create a mark amongst improve efficiency, a rattling efficient maker is required. Fig: Marker planning Objectives of this study: To utilization the to the lowest degree amount of textile to create a garment together with brand manufacture profitable every time. To cutting huge amount of textile inwards brusk time. To calculate the consumption for a detail style. To cutting large amount of textile using less people. To cutting the textile amongst perfection according to the measurement. To brand a perfect production plan. Points should live considered earlier mark planning: Fabric width must live higher than the mark width Fabric length must live higher than the mark length When the pattern pieces are set downwards on the layer of fabric, the grain employment should live parallel to the employment of the warp inwards a woven textile together with wales inwards a knit fabric. Where pattern pieces are set across the layer, the grain employment is kept parallel to weft/course. All the pattern pieces of a garment should live along the same management when set downwards on an asymmetric fabric. Length of cutting tabular array should live considered. For efficient mark planning, it is required to ensure the next things: One should easily run into the total length. To know virtually the appropriate width of the fabric. The mark starts amongst the large pattern pieces. Then fits the smaller pieces inwards the gap of the larger pieces. Thus the textile wastage is minimized together with efficiency is increased. (It is the mutual technique) After that the patterns are shuffled inwards diverse directions to trim down the mark length. It too helps to increment mark efficiency. Requirements of mark planning: Marker planning is to a greater extent than of a creative, intuitive together with conceptualizing procedure rather than a technical 1 together with in that location is no lastly final result for a mark planning. The primary utilization is to create a shortest mark past times considering all the practical together with technical constraints. The constraints inwards making a shortest mark are related to Fabric characteristics together with the blueprint requirement inwards the finished garment Cutting character Production planning Fabric feature together with the blueprint requirement inwards finished garment: 1. Alignment of patterns amongst honour to textile grain – All the patterns inwards the mark excogitation should live kept such that the grain employment inwards the pattern should live parallel to the textile selvedge for improve hanging together with draping of garments. 2. Fabric symmetry together with asymmetry – If the confront together with dorsum side of the fabrics cause got a like appearance, thence they are called ‘two-way’ or ‘symmetrical’ fabrics together with it does non warrant whatever exceptional requirement spell mark planning. The asymmetric textile where the confront together with dorsum are different needs some attending during mark planning. Examples of asymmetric fabrics are those having a nap or pile. More complicated fabrics are ‘one way’ or ‘asymmetrical’. These kinds of fabrics cause got a surface pile or a impress blueprint that has a recognizable object which tin alone live used 1 way. 3. Design requirements inwards lastly garment – Design aspects of lastly garments too cause got to live considered spell mark planning to overstep away a improve visual appearance of the finished garment. For instance, if a vertical stripe inwards a garment does non exhibit a consummate replica of a repeat on the correct together with left panels of garment it looks awkward. Methods of Marker Planning: Marker tin live made either inwards i) Manual method or inwards ii) Computerized method. In our clothe lab nosotros performed amongst manual methods. Manual mark planning: It is the conventional mark planning method together with is nonetheless used past times the garment industries where they brand unmarried garment markers. The mark planner plant easily past times moving to a greater extent than or less the full-size patterns until an acceptable mark excogitation is obtained. Multiple copies of the mark are usually required, which tin live done past times reproducing the master copy mark amongst a arrive at of duplicating methods. In this method, all patterns are inwards total dimension according to measure measurement. Hard patterns are placed on newspaper or on textile together with thence all patterns are marked past times turning different management to minimize the textile usage. The tables, on which the markers are placed, are arranged inwards such a agency thence that they exercise no tilt. Efficiency of a marker: Marker efficiency refers to textile utilization together with is defined equally the percent of the total textile that is genuinely utilized inwards garment components. It depends on how closely the patterns are arranged inwards the marker; that is, length of marker. The mark efficiency is defined past times the formula equally given below: Area of patterns inwards the mark excogitation Marker Efficiency (%) = ------------------------------------------------------------ Total expanse of the mark The influencing factors for the mark efficiency are characteristics of fabric, profile/shape of the pattern pieces together with grain requirements. Conclusion: In this experiment efficient mark planning is done without whatever experimental error. Using the to the lowest degree amount of textile to create a garment together with brand Industry profitable every fourth dimension nosotros cause got to know the mark planning . For this experiment was done rattling carefully .